No Can do, Yes CAN do….
This month’s technical trouble shooter takes a refreshing look back to basic diagnostic testing procedure and without doubt the best diagnostic tool on the market, You !!
Last week in the workshop we were lucky enough to have the company of Adam from Autologic who wanted to progress within the company into a job role which requires in depth diagnostic skills in order to carry out on site equipment demonstrations so we designed a special training course to sharpen his skills.
The first job we had in the workshop certainly wasn’t for the faint hearted and presented us with some intriguing problems which even the most skilled technicians would find challenging.
The said vehicle was an AUDI A6 2008 2.0ltr DSG auto diesel (BRE) 140 bhp which had been stood for several years and had numerous failed attempts to successfully diagnose and repair.
The vehicle had been presented to us by a local car sales pitch who had taken ownership and responsibility to repair and eventually sell.
The poor car looked like it had been used as a prop for Game of thrones up on winter fell and had started to grow moss ! There was more plant life in and around the bonnet area than the Amazon rain Forrest I was half expecting to be attacked by Tarzan after opening the bonnet.
The windscreen was badly smashed what looked to be deliberate vandalism and evidence suggests that it used to be a taxi by the witness marks both on the doors and inside the car.
The only information the car sales company could provide us with was they think it’s immobilised and the master tech from AUDI had taken a look and diagnosed the turbo and main high pressure fuel pump as being faulty which evidently had been changed. After several thousand pounds had been spent on failed repairs the AUDI tech had disappeared back into the jungle and hadn’t been seen since.
No you can understand why I said earlier not for the faint hearted.
Even the most experienced Diagnostic technicians would admit it’s difficult to know where to start on such vehicle and some wise ones out there would simply avoid !
However with a belligerent never say die attitude and Adam who is keen as mustard to role up his sleeves and get hands on tackling diagnostics I took the job on.
Pen and paper in hand I started to walk round the vehicle and explain to Adam the true art of diagnostics which ultimately relies on discipline and a religiously strict testing procedure and not to omit using the ultimate in diagnostic arsenal, yourself.
It’s tempting on such a vehicle to get distracted and mislead due to the very condition it had been left in.
I walked Adam around the vehicle and having spent 10 minutes looking inside the car and under the bonnet I quickly started to draw a picture in my head what could be the problem.
I explained to Adam that imagine this was a murder scene and in order to solve the case we must carefully look at all the evidence.
He smiled enthusiastically at me and I couldn’t help but think he thought I was a little mad, he’s probably right but it is usually a hereditary condition.
Upon my initial visual examination I found the following evidence.
- Vehicle used to be a taxi
- Timing belt cover left off
- Turbo inlet and exhaust pipes left off
- Vehicle would crank/run momentarily then die
- Jump leads on the passenger seat
- Nuts and bolts everywhere
I felt there was enough evidence here to form a diagnostic plan and know where to start. The vehicle battery was confirmed as dead so we initially had to replace it which allowed us to unlock the vehicle and carry out some electronic tests.
I then started to explain to Adam why it was important to gather such an important and accurate picture of what occurred at the moment of death. He was even more intrigued and was quoted saying it’s like CSI !
I went on to explain further about the key points what we had initially discovered and explain the importance of assessing the evidence very closely.
- Used to be a taxi, possible disturbance to CAN wiring network from taxi meter being removed.
- Timing belt cover, is the timing correct, why is it left uncovered,
- Turbo inlet, exhaust pipe disconnected, who and why ?
- Vehicle would start and then cut out immediately, which suggests immobilisation.
The immobiliser on this model is in the steering column module and is linked via engine, transmission on a CAN network. The fact the steering column would unlock and crank suggests that there is no problem with start authorisation functionality.
- Jump leads would suggest that massive inrush of current with flat battery could cause severe control module damage
- Nuts and bolts everywhere would normally suggest who ever has put it back together hasn’t done a very good job or suggests an incomplete repair. Due to the lack of history I kept an open mind.
After we had restored power to the vehicle we were able to conduct some initial tests using Autologic and carried out a quick test.
It wasn’t possible to communicate to engine, transmission or ABS module and fault existed for under and over voltage protected in every module able to communicate.
According to the central electrics 2 module DTC evidence suggested there was no communication between Engine, Transmission and ABS control module.
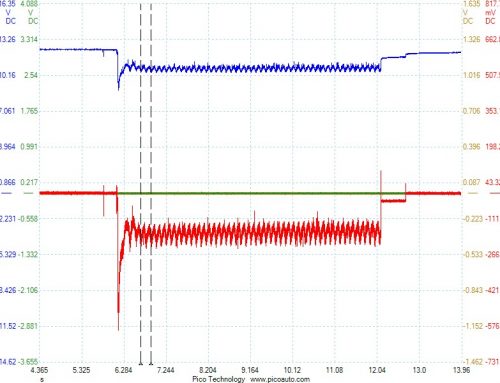
We pushed the vehicle into the workshop and wheeled the Scope over and I decided to take a look at the CAN signal which was easily accessible in the boot on the battery monitoring circuit.
Both CAN high and CAN low looked healthy on the low priority network.
The next test was to check power to the engine, transmission, ABS module and after removing the relevant plastic trim and chopping my way through the jungle all power supplies proved ok.
Still no comms to any of the above modules,
Based on the evidence it used to be a taxi and the possible disturbance to wiring in and around the dash assembly I decided to quickly drop the trim directly underneath the steering column.
Bingo !!! The fuse panel on the driver’s side A pillar had a multi plug CAN connector which had been violently hacked into and left disconnected.
I hate to say it, but I told you so.
I soldered and heat shrunk the wiring back together and I was able no to communicate with all the modules.
After a quick crank The car sprung into life and stayed running !!
I spent the next 4 hours gloating like Sherlock after defeating morriati and decided to completely reassemble the vehicle.
Since we had removed the cowling under the windscreen I decided to remove the rubber bung drain plugs and steam clean all the plantation from in and around the bonnet area. I took the time top carefully dry and lubricate all the electrical sockets and replace all the missing hoses and trim.
I went through all the remaining dtc’s and replaced several blown fuses.
I applied a BG 109 engine flush and replaced the engine oil and all the filters. It actually started to look like a presentable and respectable car again !
I even took the time to remove the glue left on by the taxi company logo on the side of the doors.
Despite the cracked windscreen it looked mint.


Gloat away stunning result !
That’s a excellent
result being a cautious detective really paid off
Just out of interest, how come the can signals on the scope didnt show an issue. I had a similar case where a can hi pin was not making contact in multi plug. when scoping can to earth the signal very noisy.
Hi jarred ! I was only only the low speed LIN network and not the high speed priority network.
This car uses 3 networks in total.
Very good job
CSI techniques in action, very good reason for gloating to
It would be nice to see the car’s before and after appearance